

Hello class! I'll be using blogger to upload class materials and examples, class notes, and links to helpful online resources. When we do class assignments, we'll pull images off here.
Topics to cover:
Basic Document Editing
Whether you start a new, blank document, or open an existing image, the most basic editing you can do is to the file itself. Many of these simple tools are found under "Image", in the menu bar at the top of the screen.
•Mode
-RGB:
-CMYK
-Grayscale
•Image Size
-Allows you to readjust the scale, resolution, and dimensions of your file.
•Canvas Size
-Allows you to readjust the dimensions of your file, without distorting your existing images.
•Image Rotate
-Allows you to rotate the entire canvas.
• Crop tool:
-In the tool box, select the crop icon, then drag a box around the part of the image you want to remain. Hit enter, and everything outside your selected area will be trimmed off.
Image Manipulation
•Spot Healing Brush
-Click on the band-aid icon. Hold the option key, then click on an area near the blemish you want to remove. This gives the tool an idea of what the affected area should look like.
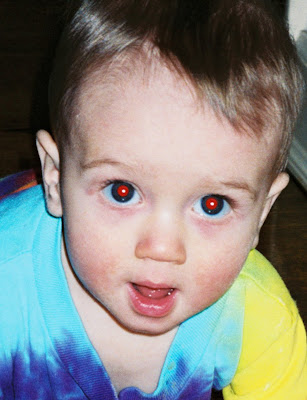
•Red Eye Correction
-click and hold on the band-aid icon. Select the red eye correction tool. Click on red pupils.
Adding Text
-Select the "T" icon from the toolbox, or simply press the letter T. Click in the image to start a new line. When finished typing, press enter to commit. To re-edit type, click within the text with the type tool selected.
-Be mindful of font, size, and justification.
-Try vertical type.
-Layer> Layer Style> Stroke, Drop Shadow, Emboss, etc.
-Warp your text for neat effects!
In Class Assignments:
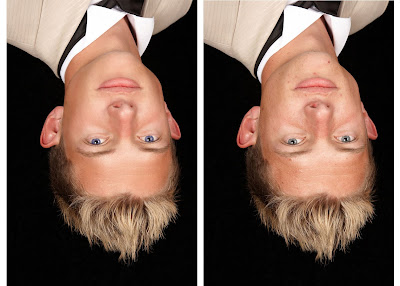
1. Open blemish.jpg
2. Rotate canvas to correct orientation.
3. Save. Discuss file formats.
4. Remove "after" shot using crop tool.
5. Using canvas size, add space to the right of the "before" shot.
6. Select the "before" shot with the rectangular marquee. Then, copy and paste it to the right of the original image.
7. Using the spot healing brush, healing brush, and clone stamp, airbrush out blemishes. Save when done.
Then...
1. Open redeye.jpg
2. Using red eye tool, correct baby's red eye.
3. Save
Next...
1. Open CDassignment.jpg.
2. Follow along as we crop an artist's image, drag into new document, then add type and graphic elements to create a CD cover.
3. Try it out yourself! I will be around to assist you.
No comments:
Post a Comment