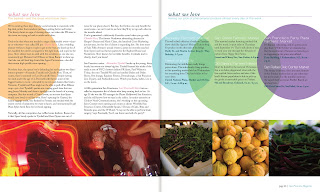


Indesign is Adobe's page layout program. It has rudimentary image making capabilities, but it's main strength is assembling images created in other programs. Conveniently, InDesign uses many of the same tools as Photoshop and Illustrator, so much of what we've already learned can be applied here as well.
*Indesign is the glitchiest of the 3 programs, so be sure to save often!
Desktop Functions
-Before beginining projects in Indesign, it is important to set up your files in an organized manner. Start by creating a new folder on the desktop. Keep all of your source files and working files in this folder, and don't change file names once you begin assembling, or InDesign won't be able to keep track of your images.
Create folders
-On the desktop, go to File>New Folder. When the name is highlighted you can rename the folder, or...
-Ctrl+click on the desktop and select New Folder
How to Find Documents
On the desktop, hit Command>N or click on the MAC OS logo at the bottom of the screen to pull up the Finder Window. Then, navigate the folders to find your desired document, or enter a keyword into the search bar on the top left and press enter.
New Document
-columns
-gutter
-margins
Units of measurement are automatically set to points. Simply type "in" after the number to convert to inches
Black line- Border
Purple Line-Margins
Similar to Illustrator, there is a artboard area that allows you to work outside the document space. This only appears in Normal Viewing Mode.
Viewing Modes
To get a better sense of your final design, you can hide guides using Viewing Modes
Normal Mode- Shows Guides, Rulers, and the Artboard.
Preview Mode- Only shows the printable elements.
Rulers
Guides-set guides by dragging from the rulers on the top and lefthand side of the artboard. Hide them, or lock them in place using Window>Guides. You can delete them by clicking on them and pressing the delete key.
ToolBox
Important Panels
-Links
_Color
-Pages
-Swatches
Text boxes
• Unlike Illustrator and Photoshop, InDesign requires you to drag a type container to create text. Like Illustrator, text will automatically wrap to fit the container.
• If your text goes beyond the container, a red icon will appear at the bottom of the container. To fix this, either change the size and shape of the container, or click on the red icon to load the cursor with the remaining type, then click elsewhere to create a new overflow text box. This can be done as many times as you want, as well as across as many pages as you want. Very handy!
Import Pictures
Use File>Place to import pictures into your document. After you select the file you want, the cursor will have an icon next to it indicating that it's "loaded" with the image. Just click to paste.
*Make sure you don't have a text container or object already selected, or the new image will fill the selection!
Editing Objects and Pictures
Object>Fitting: Fits Container to Image
Object>Transfrom: Allows you to mainpulate objects and images similar to Illustrator.
Managing Links
• Links Palette
Saving Vs. Exporting
•Use Save to maintain your working file. The file format is .indd. To prevent your links from being broken, make sure you keep the original art and working InDesign Document in the same place.
•Use Export when you are finished with your project and are ready for print. Export saves your documents as more usable files, such as PDFs, or JPEGs.
Class Assignment:
Take pictures and text and create a 2 page magazine layout.
No comments:
Post a Comment